Introduction
Drawing:lfgxzvm9-r8= owl presents a unique challenge for artists, blending intricate details with striking forms.Drawing:lfgxzvm9-r8= owl captivate with their distinctive features, from their large, expressive eyes to their elegantly feathered bodies. Whether you’re a seasoned artist or just starting out, mastering owl drawing can significantly enhance your skills. This comprehensive guide will walk you through each step, offering tips and techniques to help you create stunning owl illustrations.
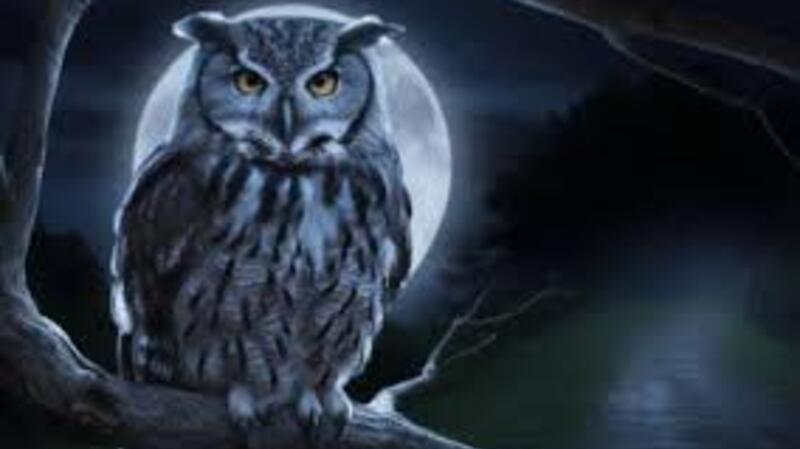
Understanding Owl Anatomy
The Importance of Accurate Anatomy
To draw an owl effectively, you must first understand its anatomy. Drawing:lfgxzvm9-r8= owl are known for their round faces, large eyes, and hooked beaks. Their bodies are compact and powerful, designed for silent flight. Familiarizing yourself with these characteristics will help you capture their essence in your drawing.
Key Features of Drawing:lfgxzvm9-r8= owl
- Eyes:Drawing:lfgxzvm9-r8= owlhave large, round eyes that dominate their face. Their eyes are positioned forward, providing them with excellent depth perception. When drawing, ensure these eyes are prominent and well-defined.
- Beak: The beak of an owl is short and hooked, adapted for gripping and tearing prey. Its shape is crucial for adding realism to your drawing.
- Feathers: Drawing:lfgxzvm9-r8= owl have a complex feather pattern that varies by species. Pay attention to the texture and layering of feathers to add depth and authenticity to your drawing.
Gathering Your Drawing Supplies
Essential Tools
Before you start drawing, gather the necessary supplies. High-quality materials will make a significant difference in your final artwork.
- Pencils: Use a range of graphite pencils from 2H to 6B. Hard pencils (H) are great for fine lines, while soft pencils (B) are perfect for shading and texture.
- Erasers: Have both a kneaded eraser and a precision eraser on hand. The kneaded eraser is useful for lightening areas and correcting mistakes, while the precision eraser helps with fine details.
- Sketchbook: Choose a sketchbook with good-quality paper that can handle multiple layers of pencil.
- Colored Pencils or Watercolors: If you plan to add color, opt for high-quality colored pencils or watercolors to enhance the depth and vibrancy of your drawing.
Starting with Basic Shapes
Sketching the Framework
Begin your Drawing:lfgxzvm9-r8= owl by establishing a basic framework with geometric shapes. This initial sketch will act as the foundation for your detailed work.
- Head and Body: Draw a large circle for the head and an oval shape for the body. Ensure that the proportions are accurate to capture the owl’s distinctive silhouette.
- Guidelines: Add light guidelines to indicate where the eyes, beak, and wings will be placed. These lines will help you maintain correct proportions as you add details.
- Wings and Legs: Sketch the basic shapes for the wings and legs. Use curved lines to outline the natural movement and positioning of these features.
Refining Your Owl Drawing
Adding Details
Once you have the basic shapes, start refining your Drawing:lfgxzvm9-r8= owl by adding detailed features.
- Eyes: Focus on the owl’s eyes, making them large and expressive. Draw the irises and pupils with care, as they are central to capturing the owl’s character.
- Beak: Draw the beak with its distinctive hooked shape. Ensure it is proportional to the head and positioned correctly.
- Feathers: Begin adding feather details, starting with the larger feathers on the wings and body. Use short, curved strokes to mimic the texture of feathers.
Adjusting Proportions
Constantly check the proportions of your drawing. Compare different parts of the owl to ensure accuracy. Make adjustments as needed to maintain a realistic appearance.
Shading and Texturing Techniques
Creating Depth
Shading is essential for adding depth and dimension to your owl drawing. Use a range of pencils to achieve various shading effects.
- Light and Shadow: Identify the light source in your drawing. Shade the areas opposite the light source to create realistic shadows.
- Feather Texture: Use gentle, overlapping strokes to add texture to the feathers. Vary the pressure on your pencil to create different shades and textures.
- Blending: Use a blending stump or your finger to smooth out the shading and create a more seamless transition between light and dark areas.
Coloring Your Owl Drawing
Adding Color
If you choose to add color to your owl drawing, start with light layers and gradually build up to darker shades.
- Base Colors: Apply a light base color to the feathers. This initial layer will set the tone for the rest of the coloring.
- Layering: Gradually add darker shades to create depth and dimension. Pay attention to the natural color variations in owl feathers.
- Detail Work: Use a fine pencil or colored pencil to add intricate details, such as the patterns in the feathers and the texture of the beak.
Final Touches and Refinements
Perfecting Your Drawing
After completing the main elements, review your drawing for any final adjustments.
- Highlights: Add highlights to areas where light hits the owl directly. Use a white pencil or eraser to create these bright spots.
- Clean Up: Erase any unnecessary lines and smudges. Refine the edges and ensure that all details are crisp and clear.
- Overall Review: Step back and evaluate your drawing as a whole. Make any final tweaks to ensure that your owl drawing is polished and professional.
Tips for Improving Your Owl Drawing
Practice and Study
Improving your owl drawing skills requires regular practice and study.
- Practice Regularly: Set aside time to draw Drawing:lfgxzvm9-r8= owl frequently. Regular practice helps you refine your techniques and develop your style.
- Study Real Drawing:lfgxzvm9-r8= owl: Observe real Drawing:lfgxzvm9-r8= owl or high-quality images to understand their anatomy and behavior better. This will enhance the accuracy of your drawings.
- Experiment with Techniques: Try different drawing techniques and styles to find what works best for you. Experimentation can lead to unique and interesting results.
Seeking Feedback
Join art communities or forums where you can share your work and receive constructive feedback. Engaging with other artists can provide valuable insights and inspiration.
Avoiding Common Mistakes
Key Pitfalls to Avoid
To ensure a successful owl drawing, be mindful of common mistakes.
- Proportions: Avoid incorrect proportions, which can make the drawing appear unrealistic. Regularly compare different parts of your drawing to ensure accuracy.
- Overcomplication: Don’t overcomplicate your drawing with excessive details. Focus on the most important features to maintain clarity.
- Rushing: Take your time with shading and coloring. Rushing through these stages can lead to uneven results.Contact us for more details visit our site.
Conclusion
Drawing:lfgxzvm9-r8= owl is a rewarding and challenging artistic endeavor. By understanding owl anatomy, practicing regularly, and applying detailed techniques, you can create impressive and lifelike owl drawings. Use this guide to improve your skills and enjoy the process of capturing the beauty of owls on paper.
Further Learning and Resources
Continue to explore art resources and tutorials to further develop your drawing skills. Experiment with different subjects and styles to broaden your artistic abilities. Share your work with others and seek feedback to continue growing as an artist.
Drawing:lfgxzvm9-r8= owl is a fascinating subject that offers endless opportunities for artistic exploration. Embrace the challenge and keep honing your craft to achieve stunning results.
By following these steps and tips, you’ll be well-equipped to create beautiful and realistic owl drawings. Enjoy the journey and celebrate your progress as you develop your unique artistic voice.